Як зробити чорновий варіант поста?
After you add content to a post you can save it as a draft. To do this, click the “Save to Draft” on the post scheduling page:

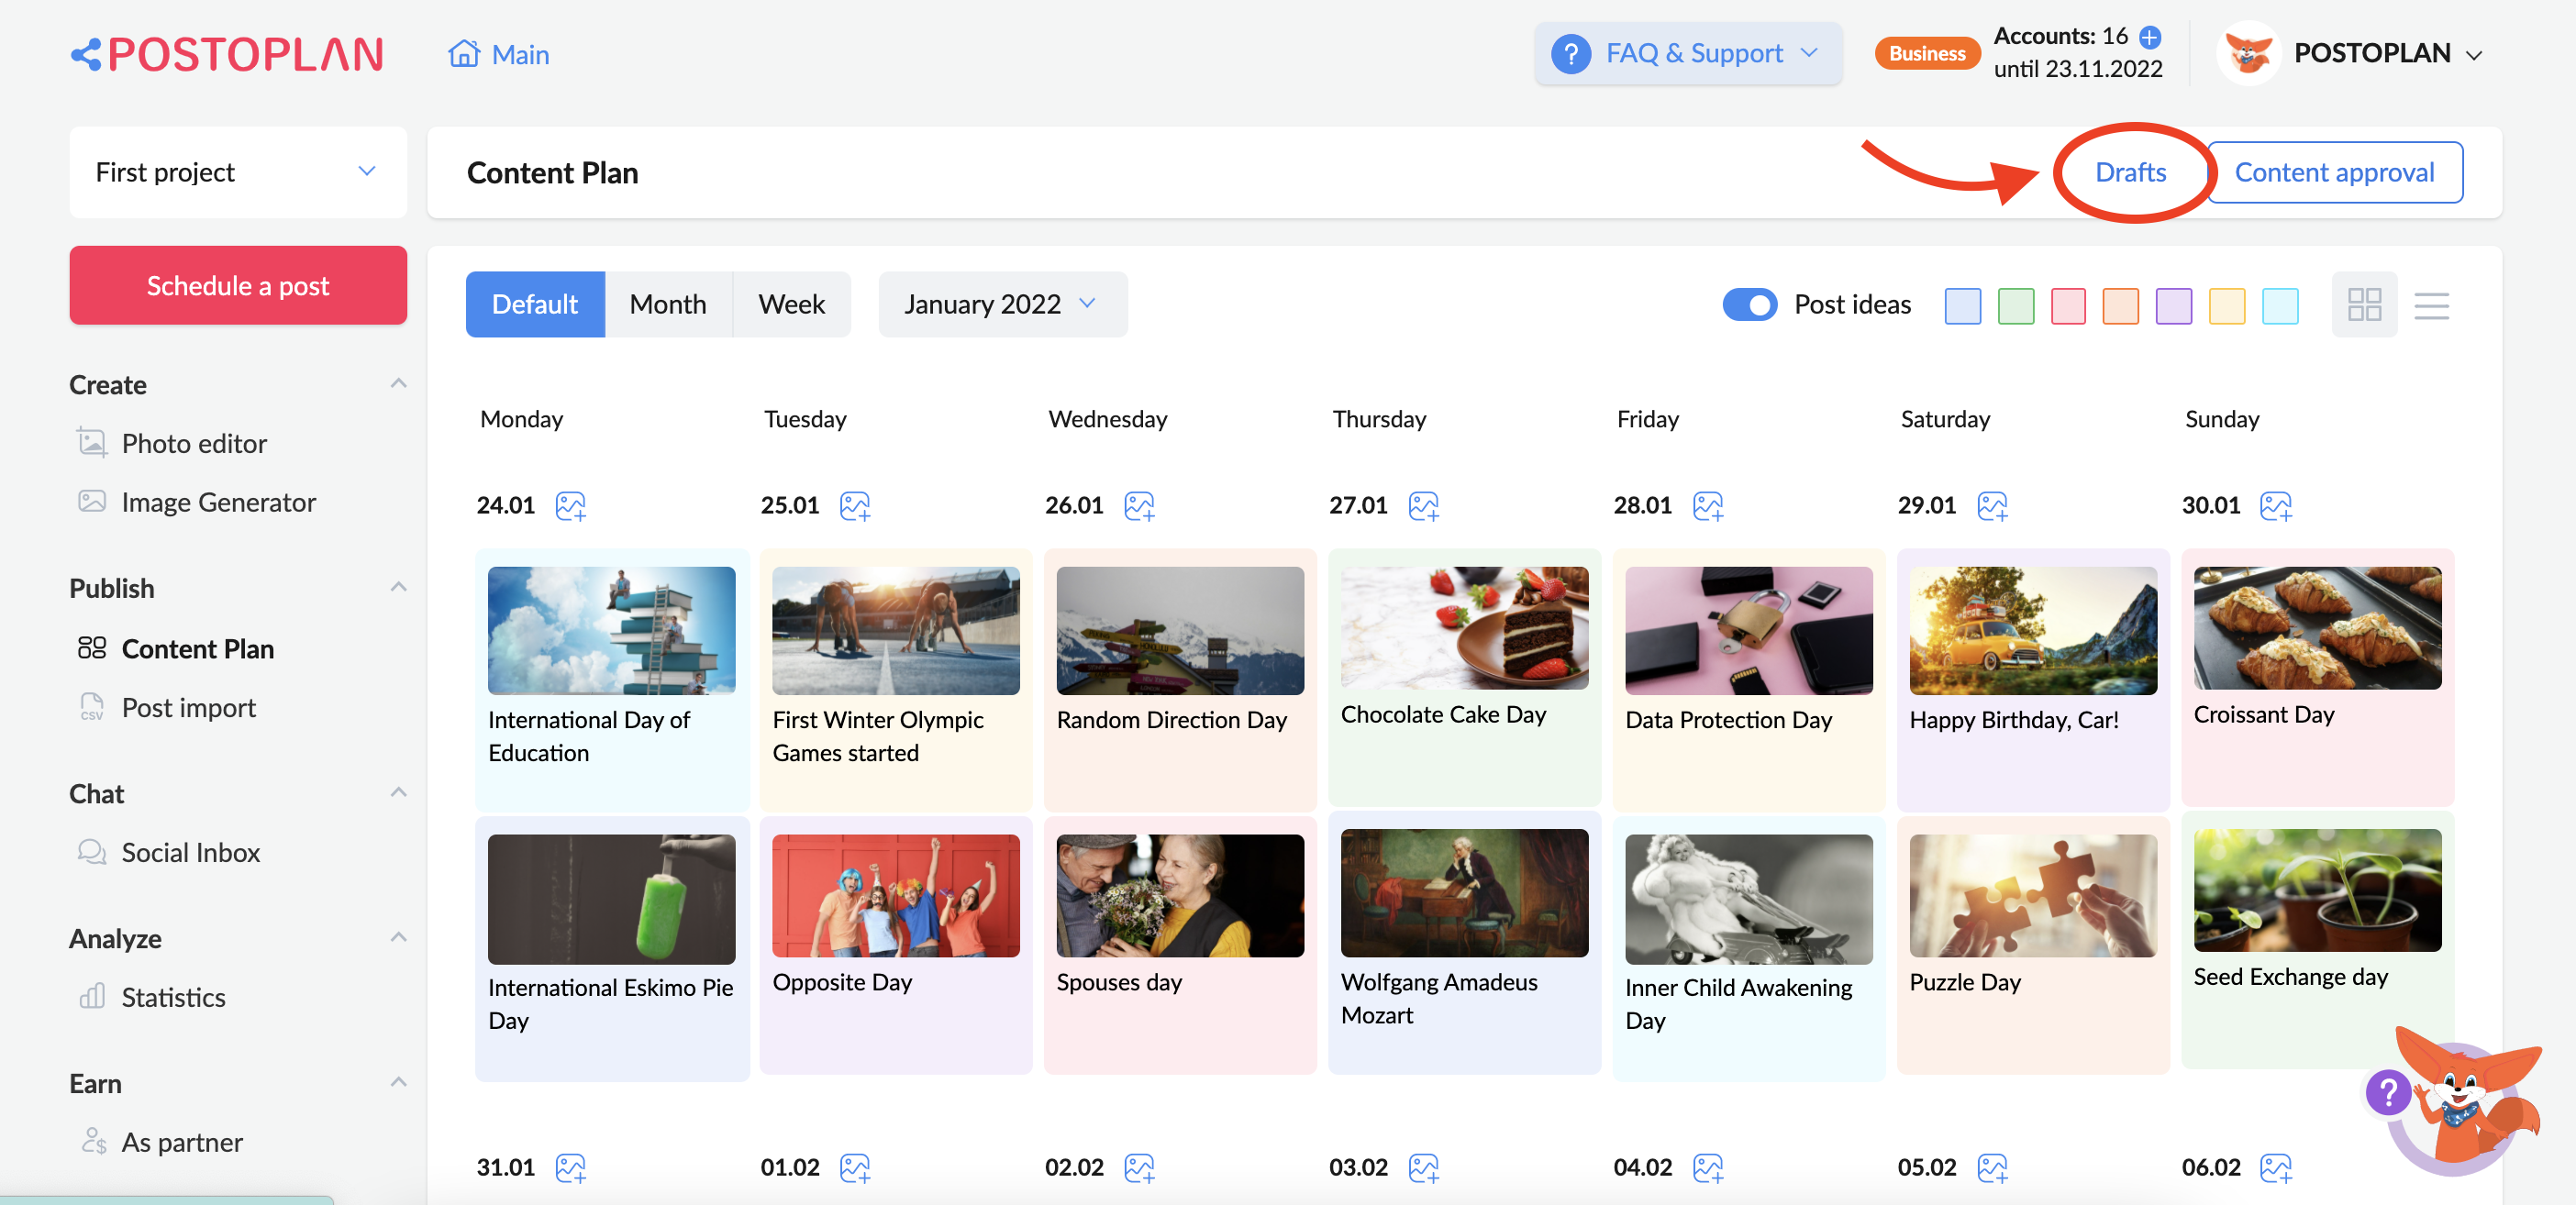
To get to the drafts page, click the “Publish” tab, in the “Content Plan” section, and then click the “Drafts”:
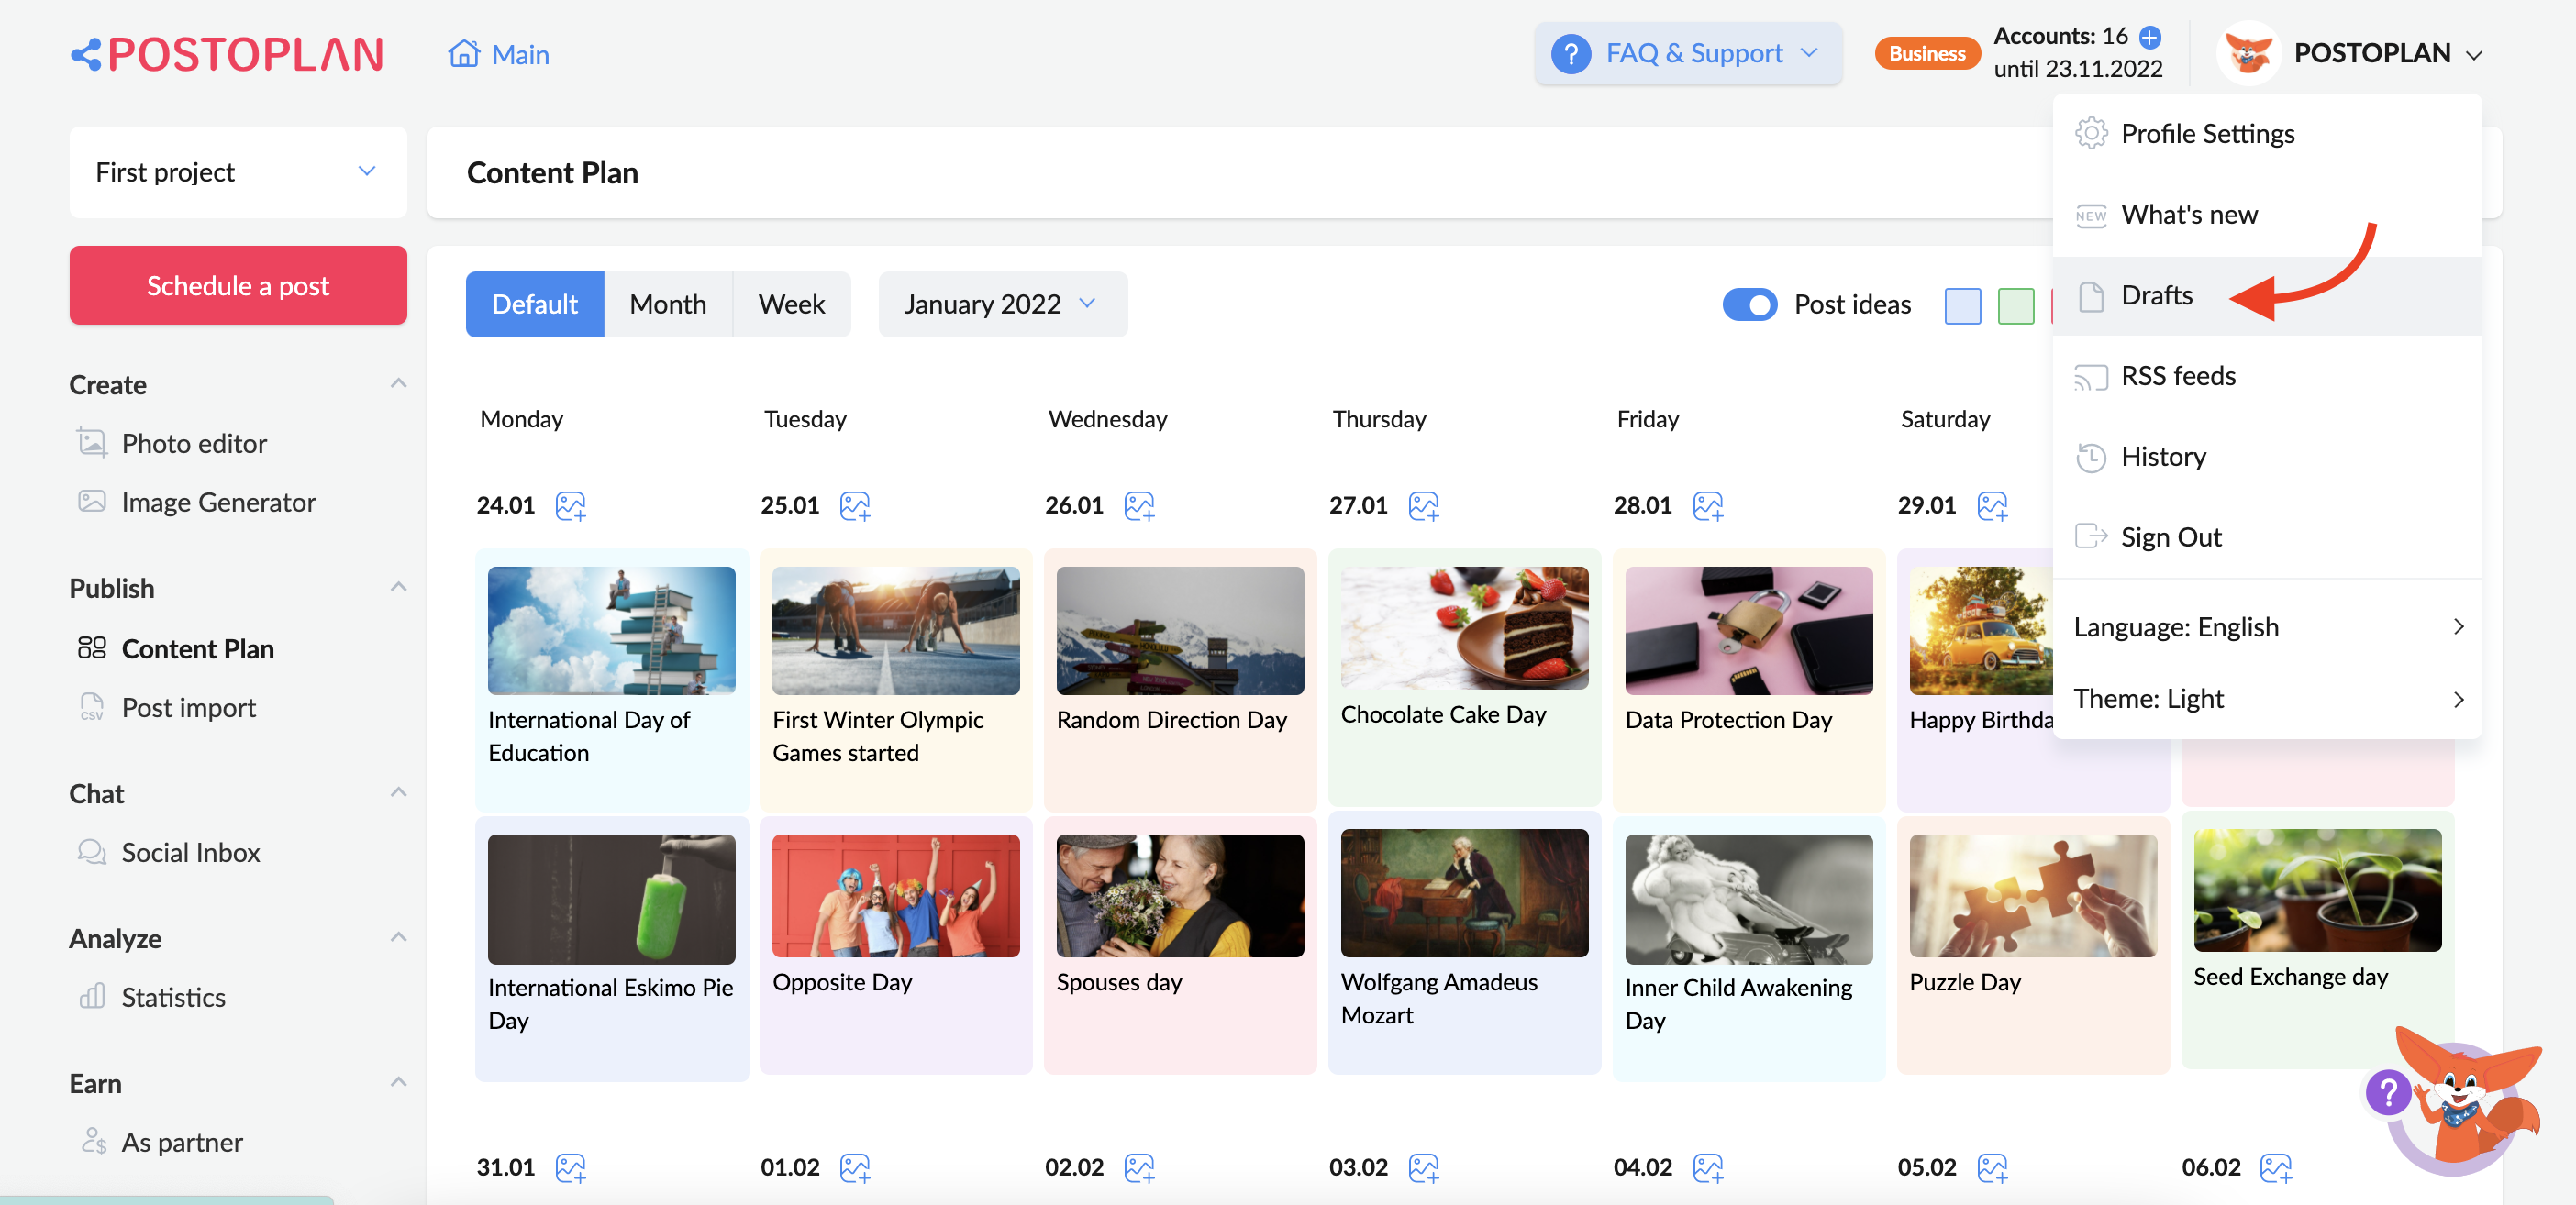
Or you can choose “Drafts” from the drop-down menu for quick access:
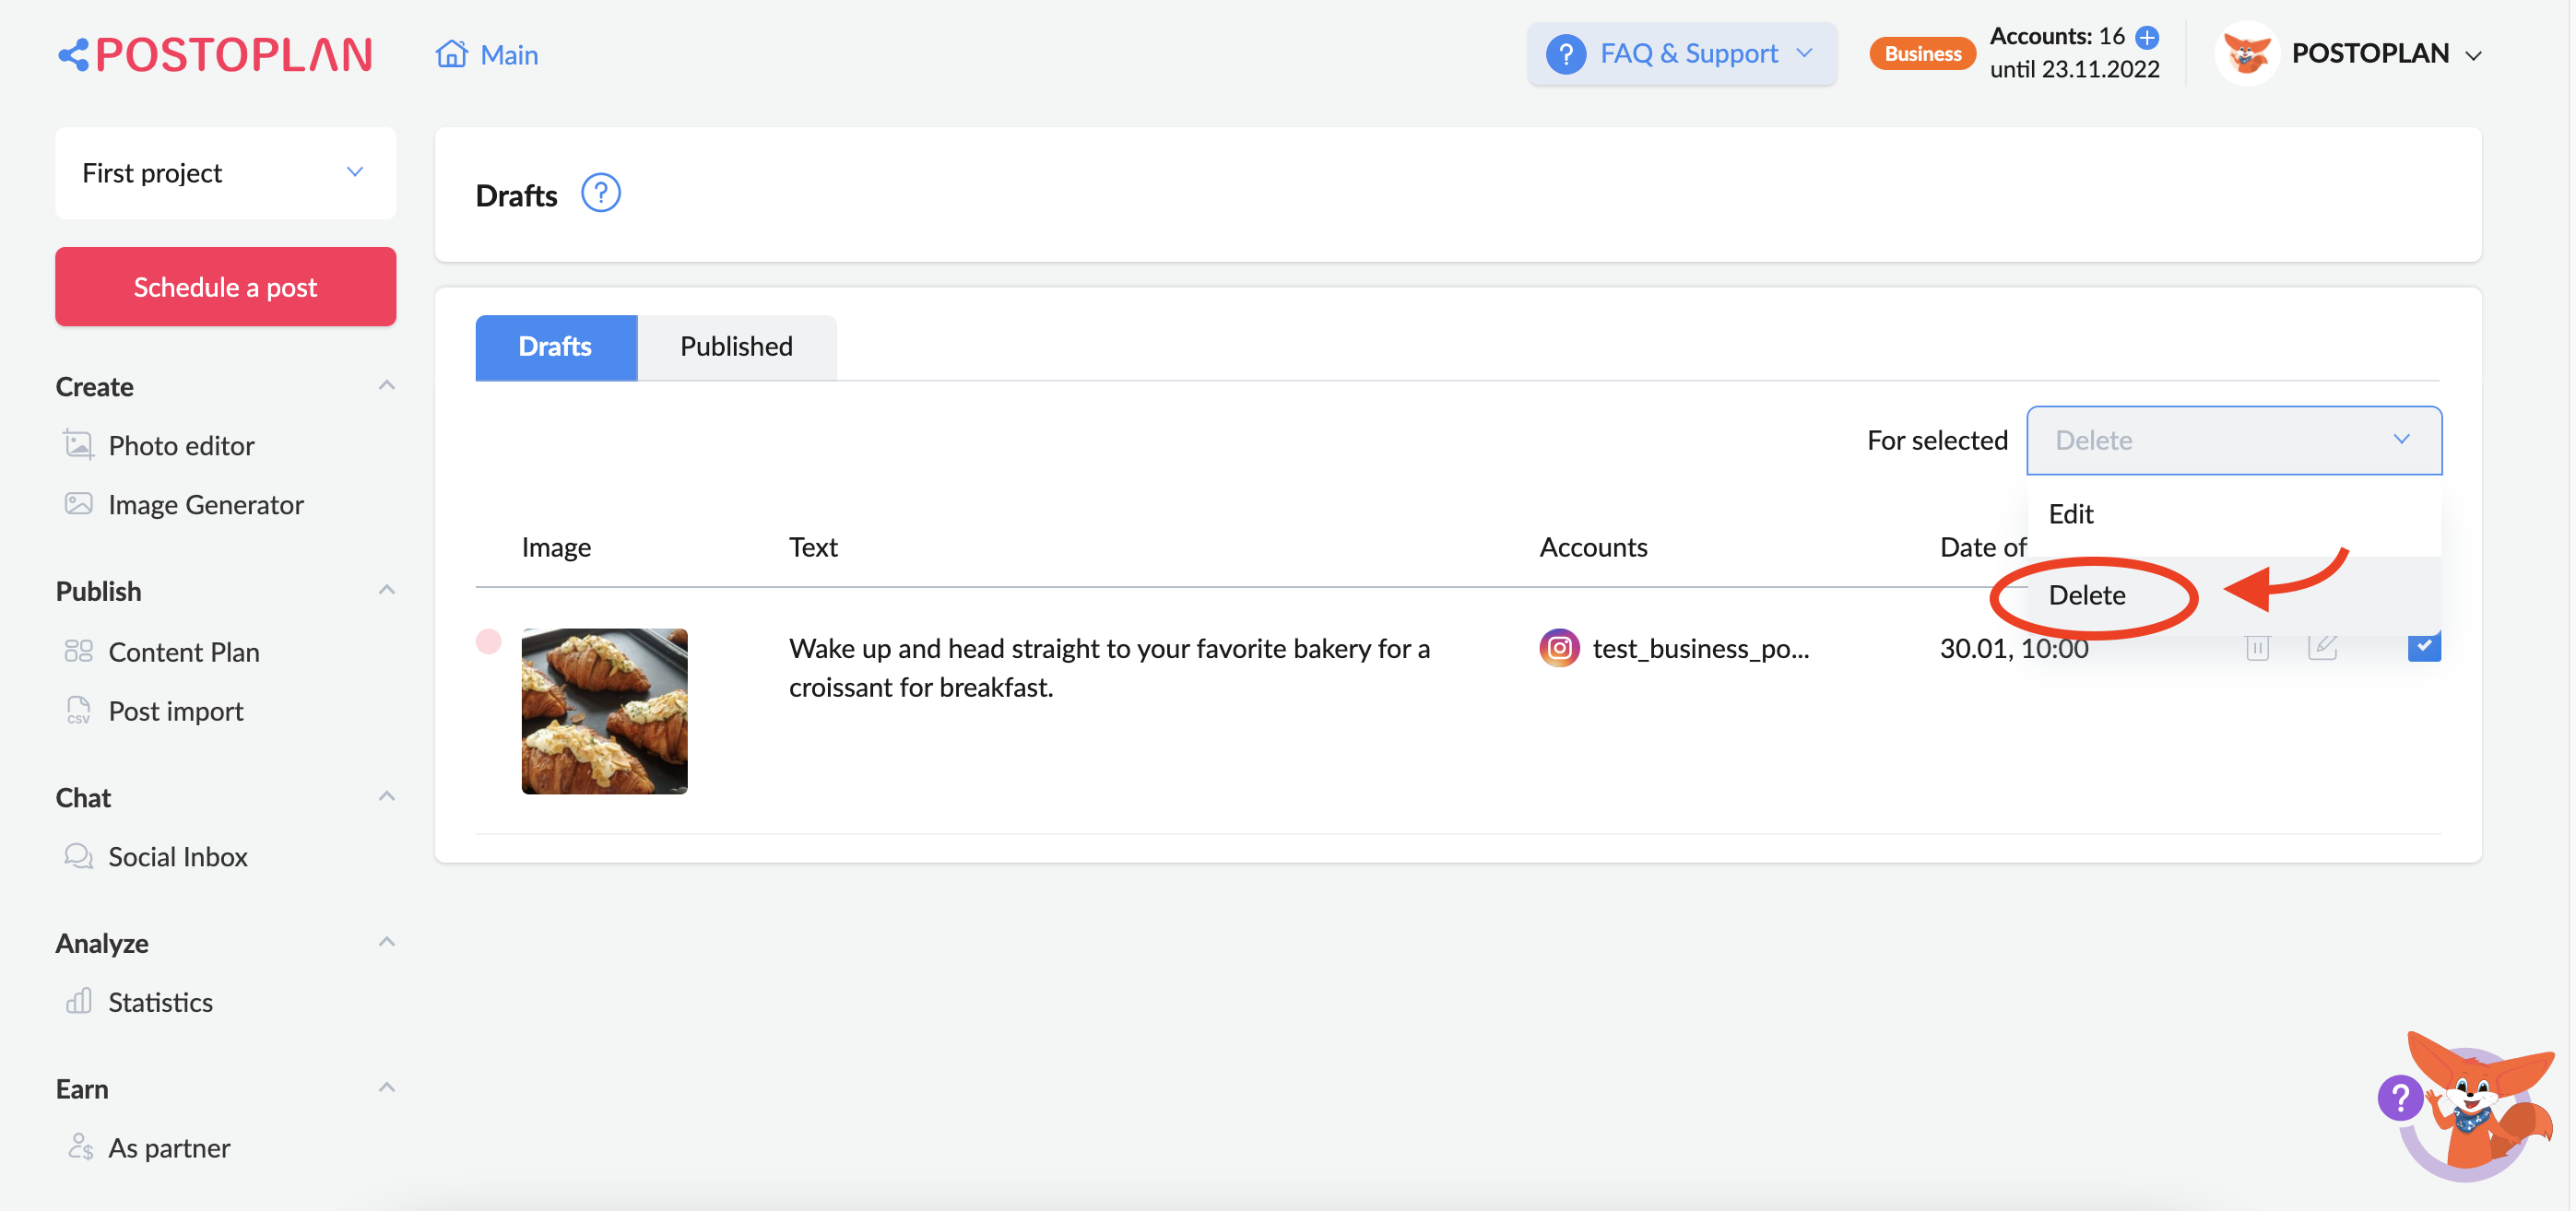
On the “Drafts” page, you can view future posts, edit them, change the posting time, add media, emoji, change text, add accounts or delete drafts:
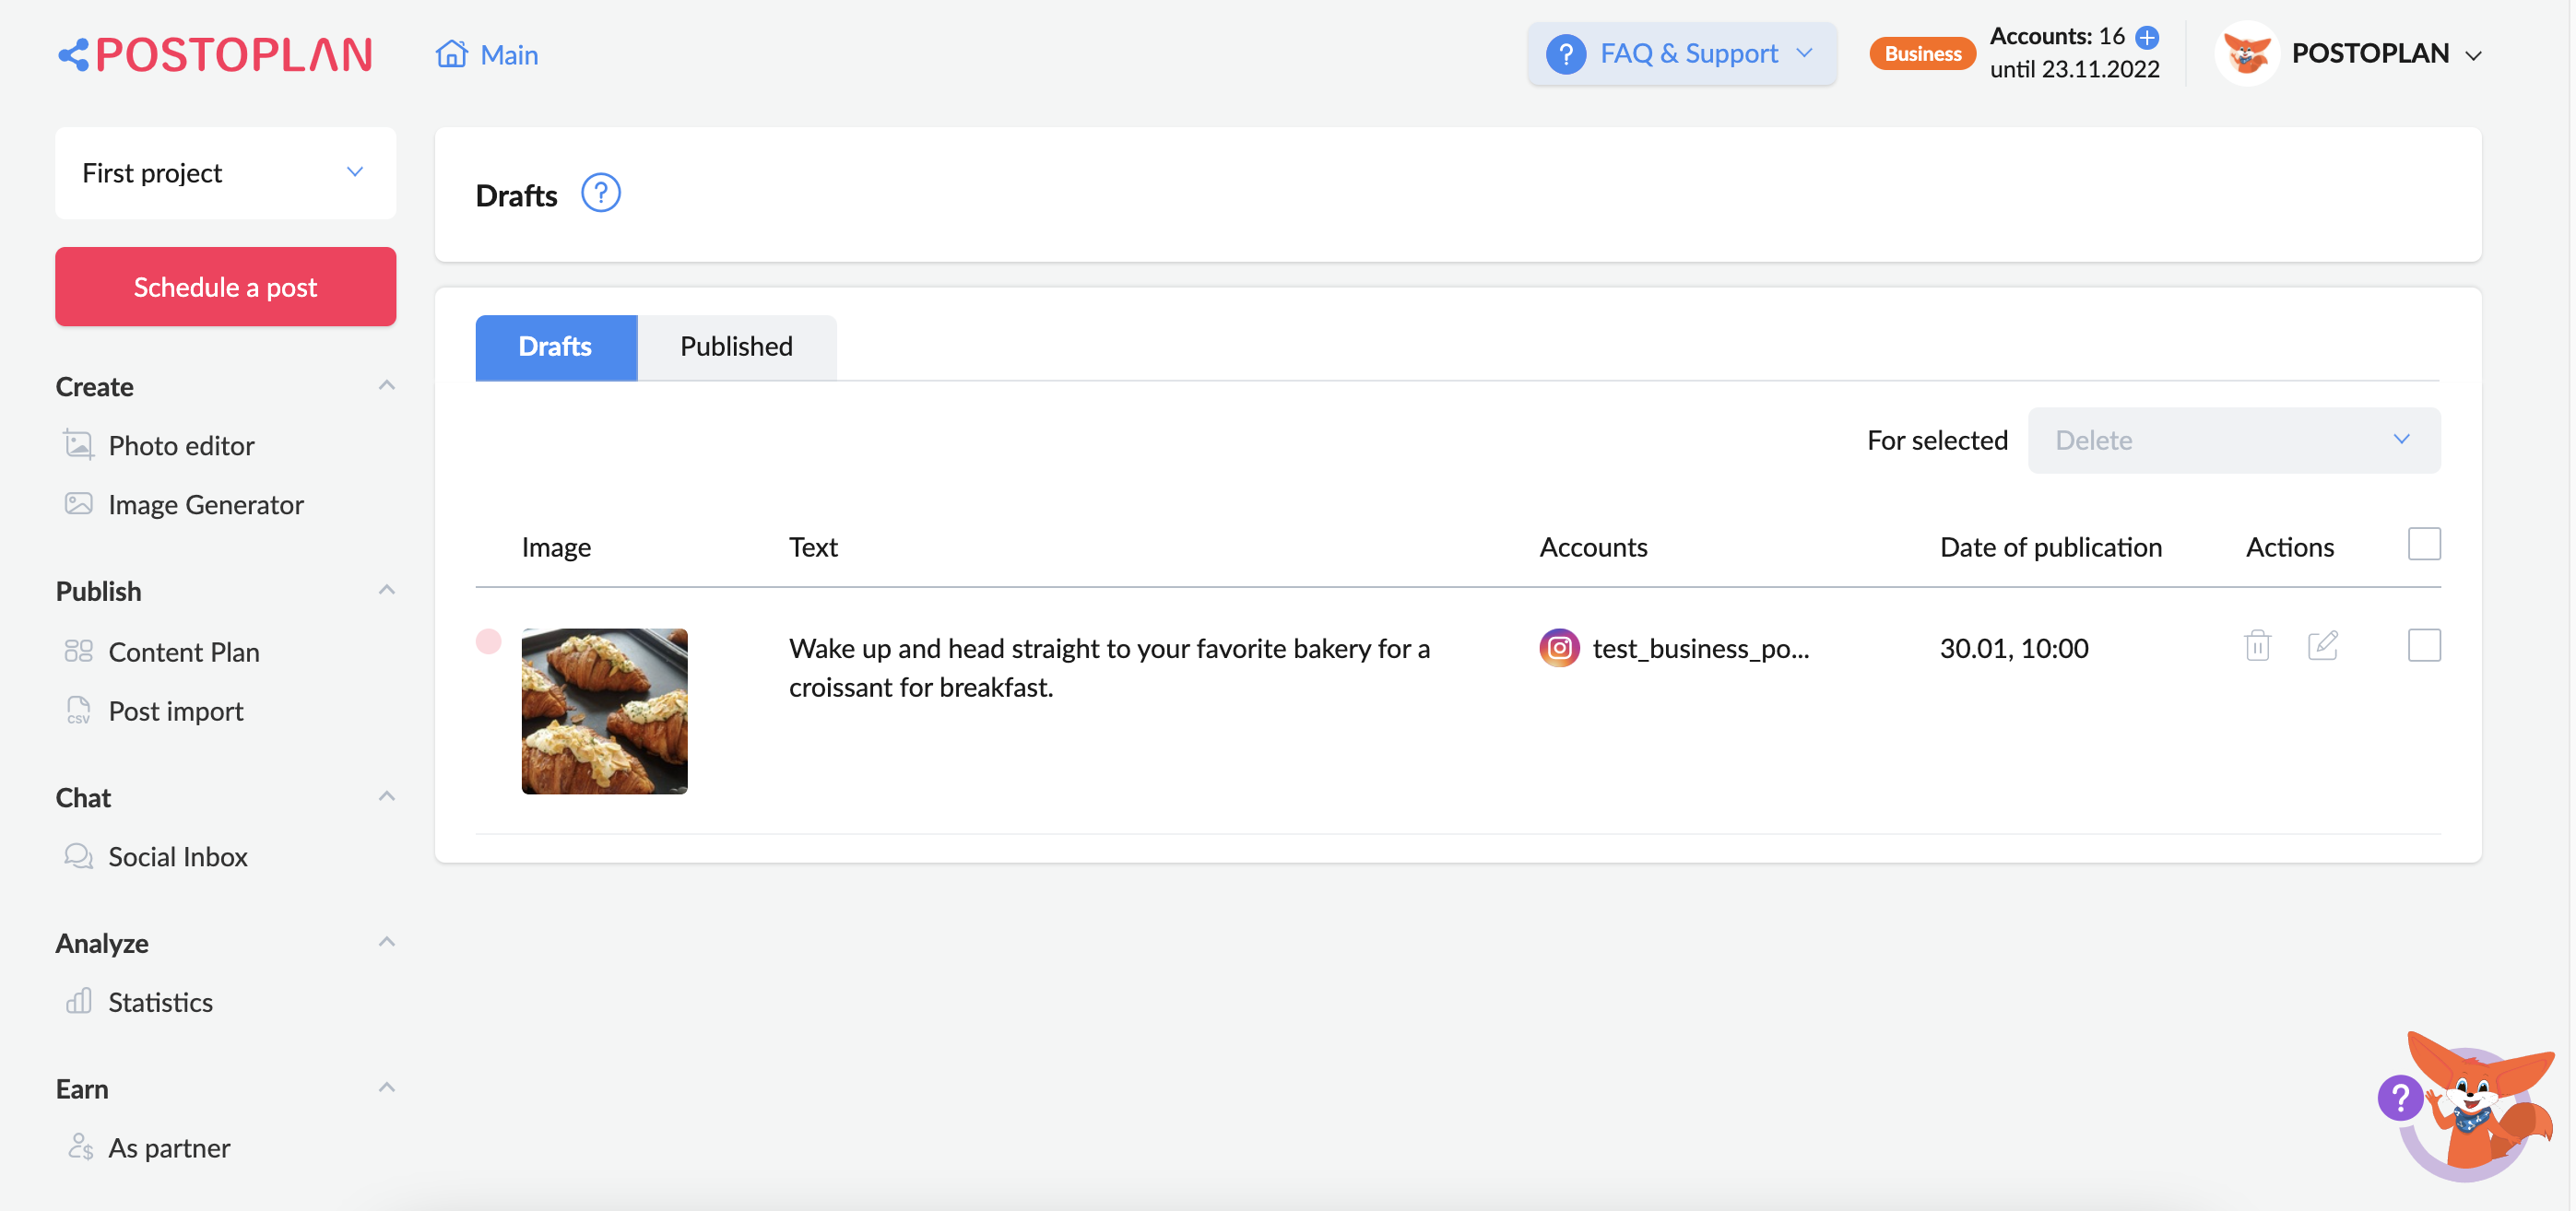
Columns:
- Image – contains a preview of the media file added to the post (picture/video/gif)
- Text – the text of the post
- Account – selected social networks profiles for the post
- Post date – the date the post is scheduled to be published
- Actions – editing or deleting the current post
- Checkbox – select all posts
You can also do the mass scheduling or deleting the posts from the “Drafts” section. To do this, select the posts in the checkbox or click “select all” and choose the “Schedule” or “Delete”:
 Click “Schedule” to schedule the selected posts. You will be directed to the edit page for the selected posts. In order for the post to be included in the content plan, you need to expand the Draft and click the “Schedule”:

Repeat this step with each of your posts. You can find scheduled Drafts in the “Content Plan” section.